05 - TimeLapse Schedule Setup and Project Setup on CloudXUpdated 4 months ago
Once your camera is registered, it will appear under "My Devices" - top left in the left hand navigation pane.
This article will:
- Assign the camera to a project
- Setup a new timelapse capture schedule
Assigning a project
We will now assign the camera to a project. Note this step is optional but it is highly recommended. If you just want to setup an initial schedule, skip to the instructions below.
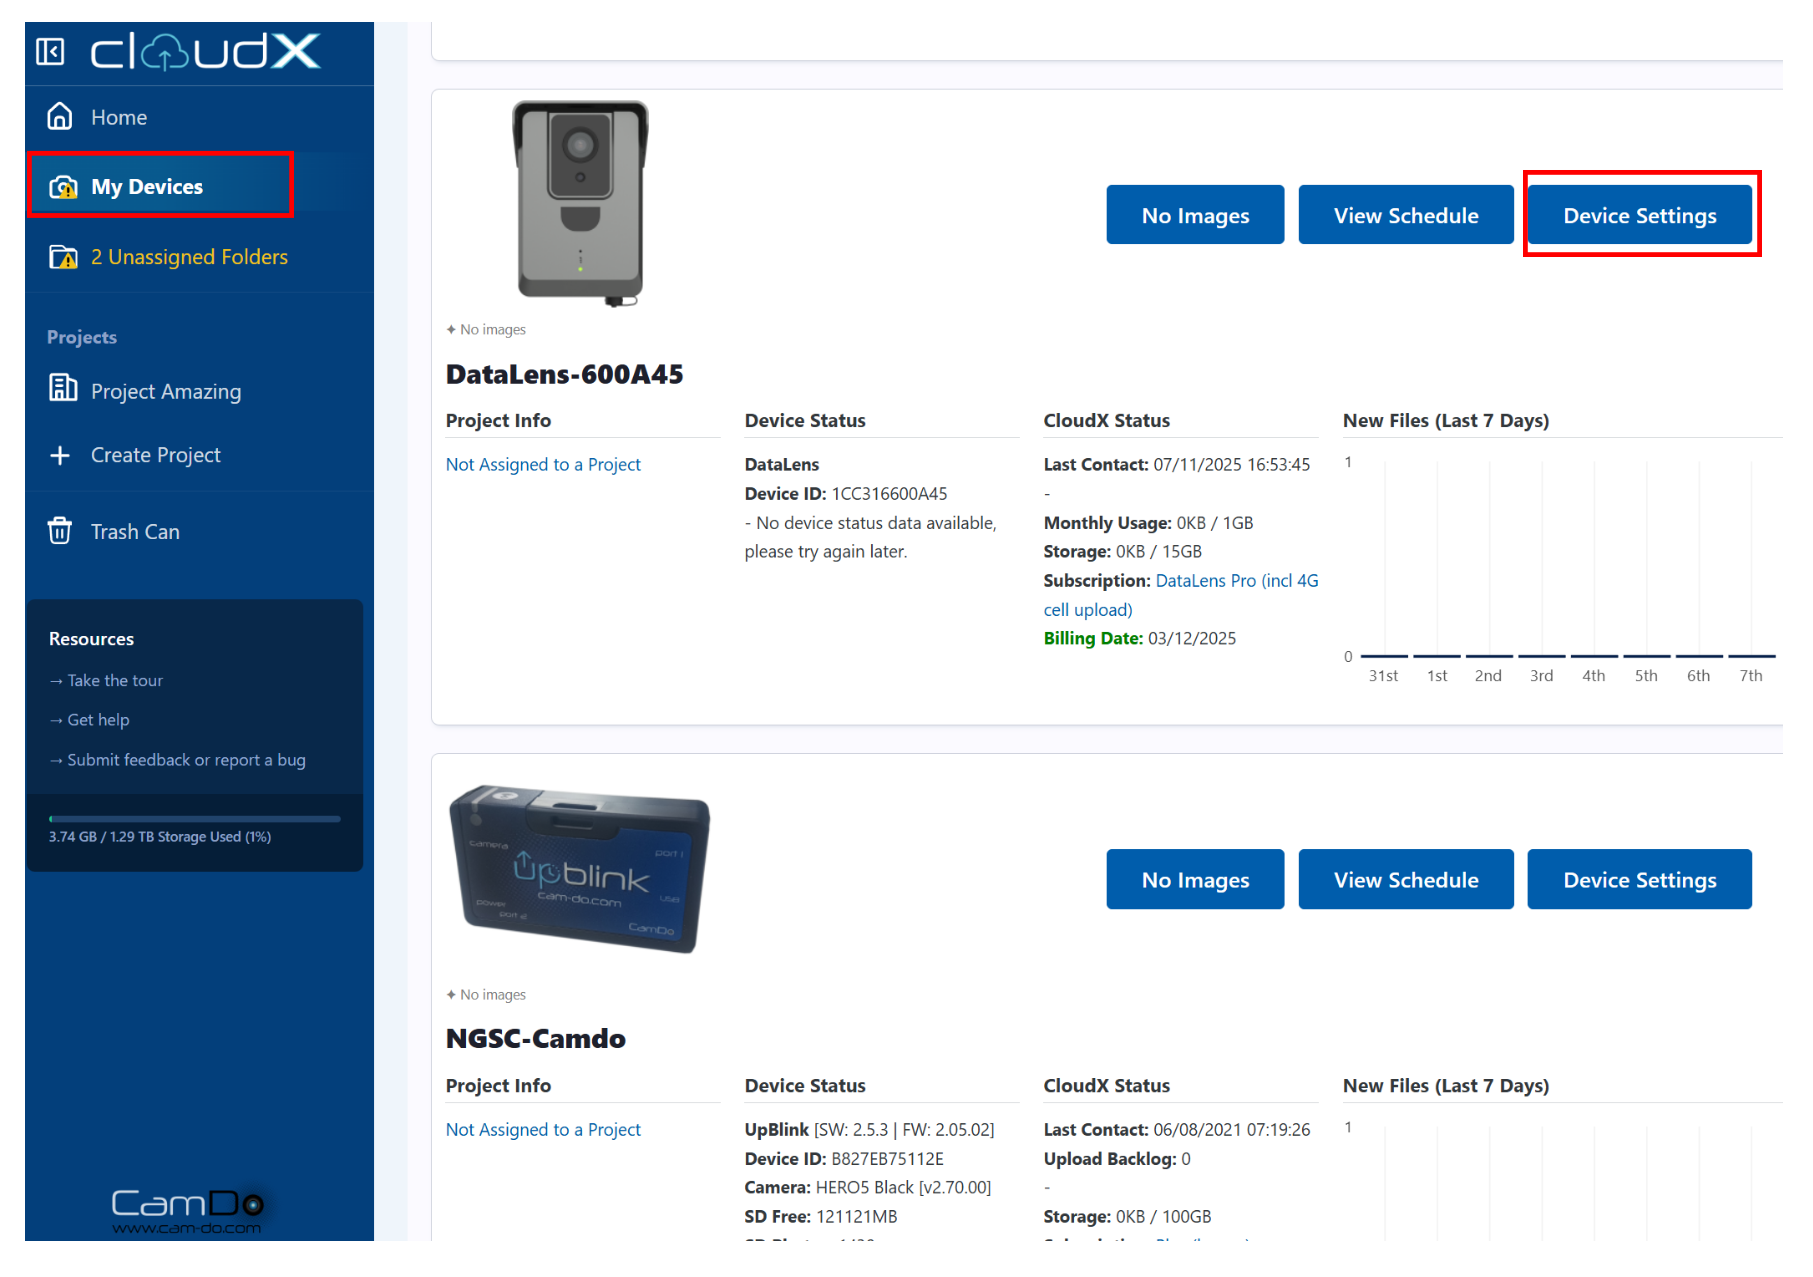
- Click on My Devices.
- Then find the device and click on "Device Settings"
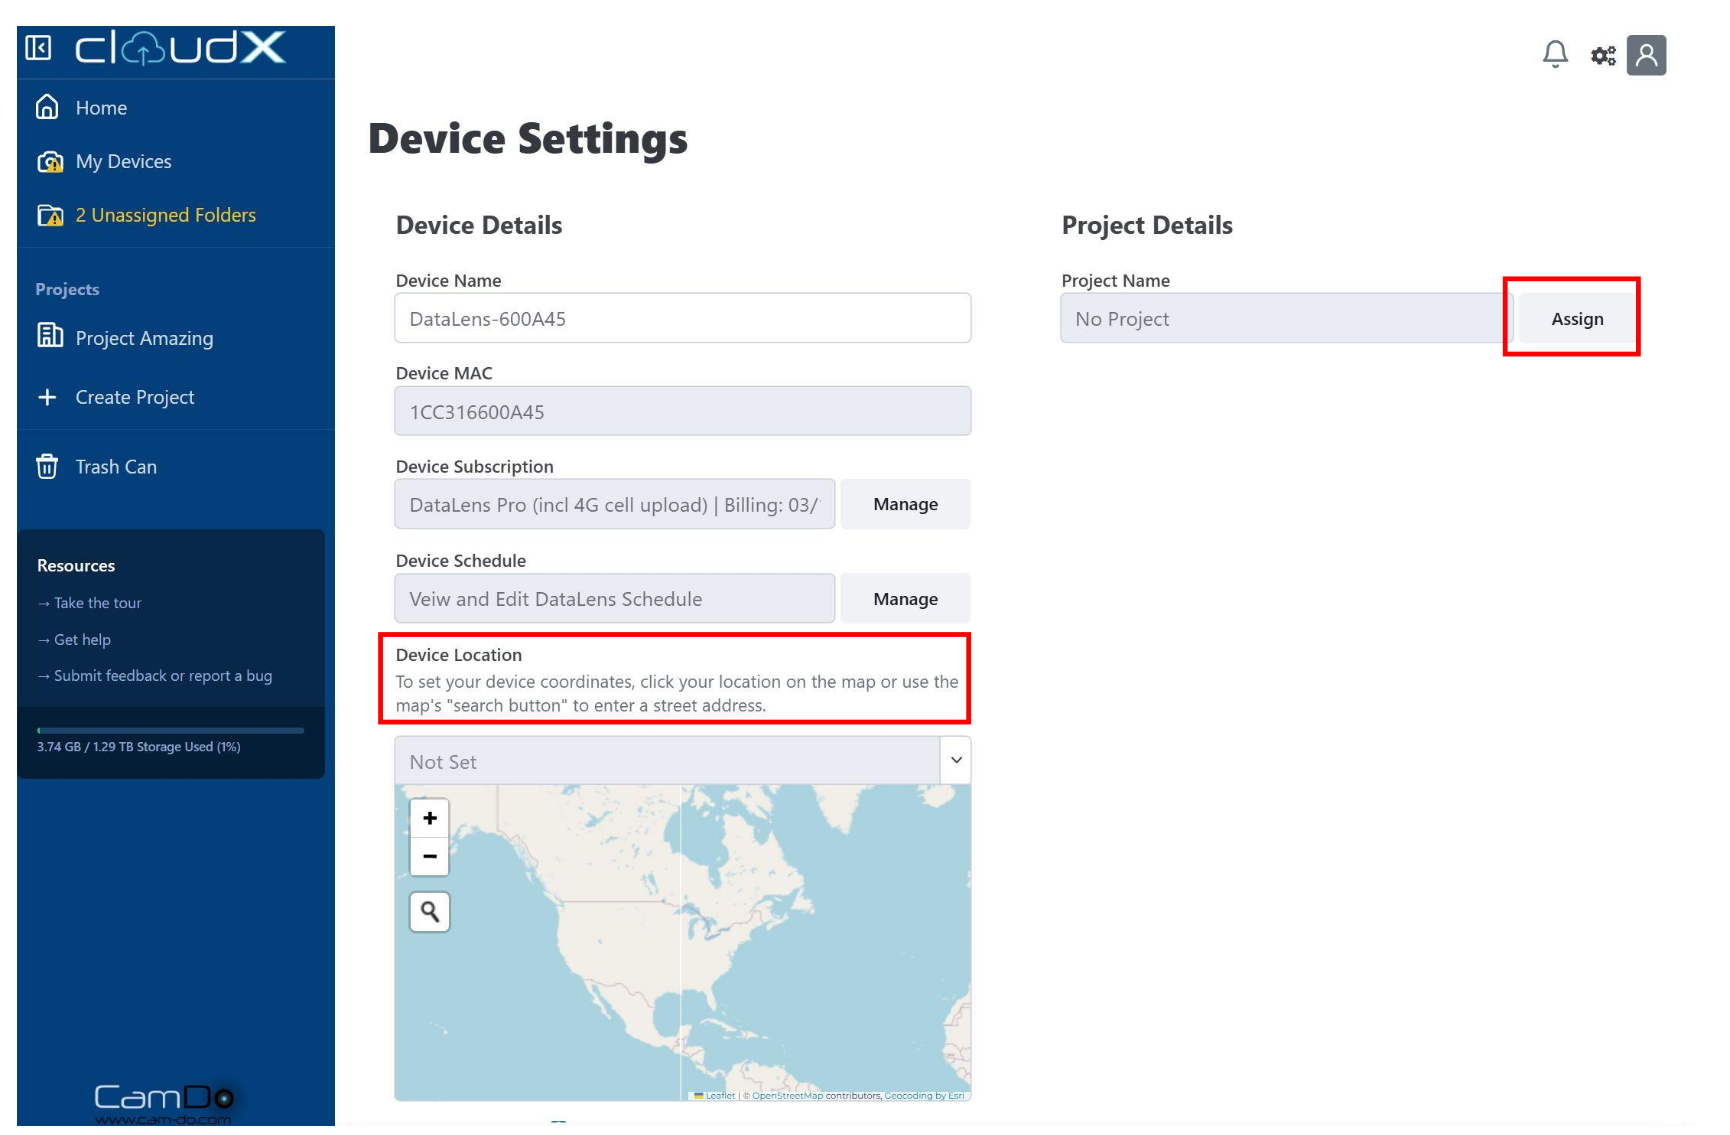
You now have the option of setting:
- Device Location - click on the map to set a position or search for an address
- Project - To assign the device to a project, click on "Assign". If it is already assigned to a project and you want to move it, click on "Manage". Projects are very useful when you have multiple cameras per site or multiple cameras across various sites.
- Choose the project.
- Click Save.
If you want to setup a new project, you can watch this video here for further guidance.
Setting up a Schedule
To setup an initial schedule on CloudX.
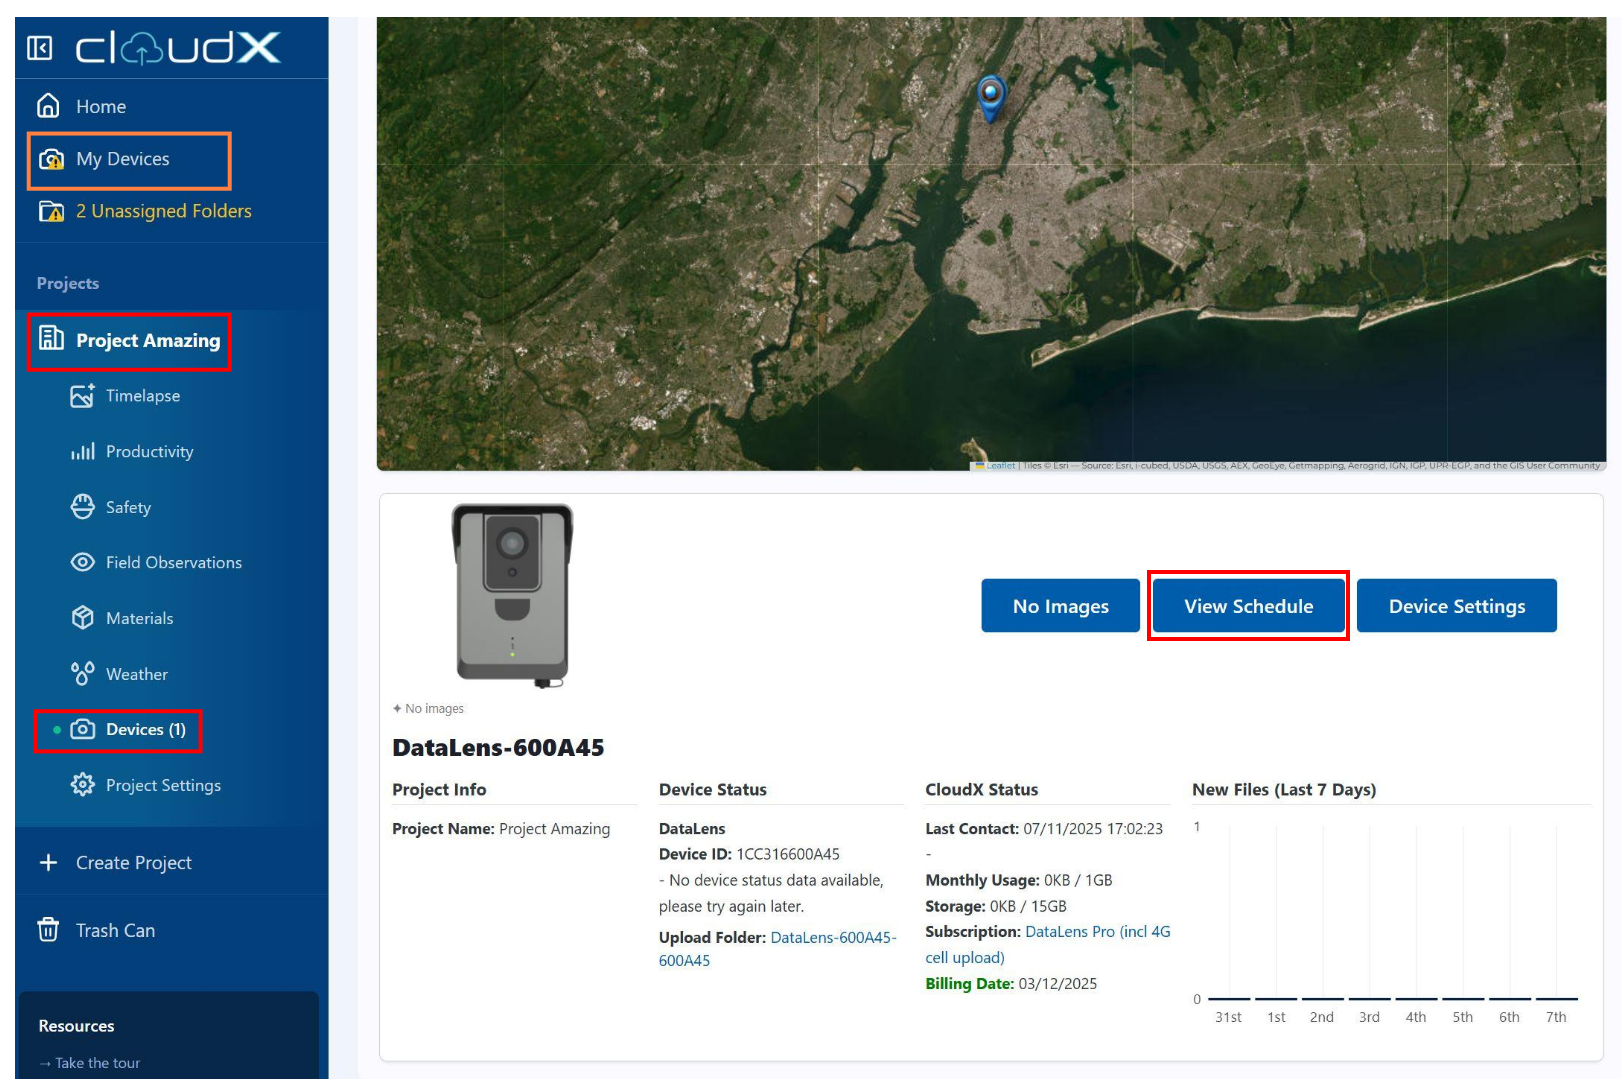
- Select the project on the left.
- Click on "Devices". If the device is not part of a project yet, click on "My Devices" in top left instead.
- Click on "View Schedule"
The Schedule page has a few sections.
- Camera Preview
- Camera Configuration
- Setting up the Capture Schedule
Camera Preview
You can check the camera connectivity and the camera view by using the Camera Preview function.
- The camera must be ON and have an active 4G mobile as per the previous articles on setting up the SIM card.
- Click on "Get Camera View".
- The preview may take up to 60 seconds depending on what state the camera is in, as it may have to "wake-up"

Camera Configuration
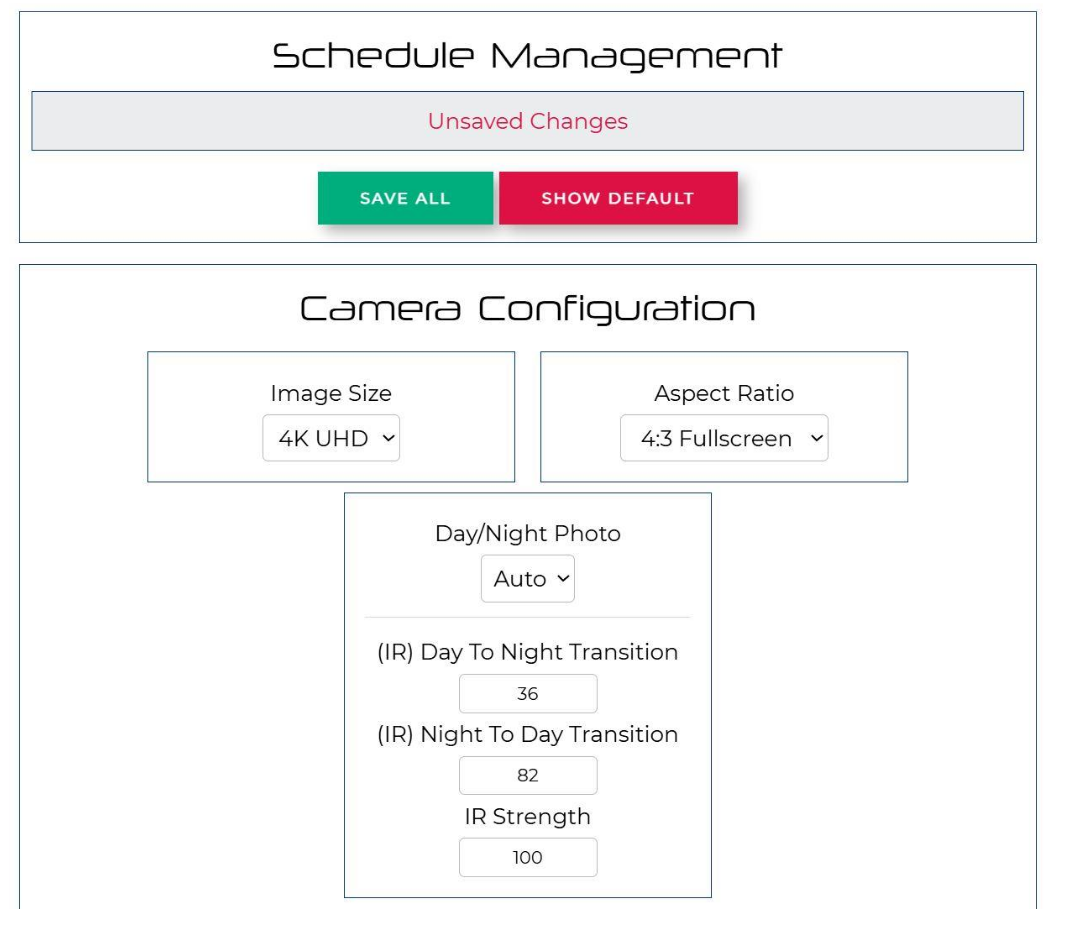
Scroll further down to Camera Configuration. Under this section you can change:
- Image size/quality
- Aspect Ratio
- Day/ Night Photo modes. This can be set to "Day", "Night" and "Auto" where the camera will automatically transition between day and note modes. To use the automatic mode, set the:
- Day to Night Transition Level
- Night to Day Transition Level
- IR Strength which is how bright the infrared (IR) lamps on the camera will illuminate.
- Note that a "Night" photo will appear black and white.
- If you have no need for night time shots, it is not recommend to leave it on "Auto", change the mode to "Day" only.
Under Additional Photo Settings there are several additional camera settings available. If you can't see the settings, click on the yellow bar to open the drawer.
If you are unsure, just leave these settings as the default.
For the clearest photos, set "Shutter Speed" to "Static". This will use a slower shutter speed and therefore the shot will be less grainy.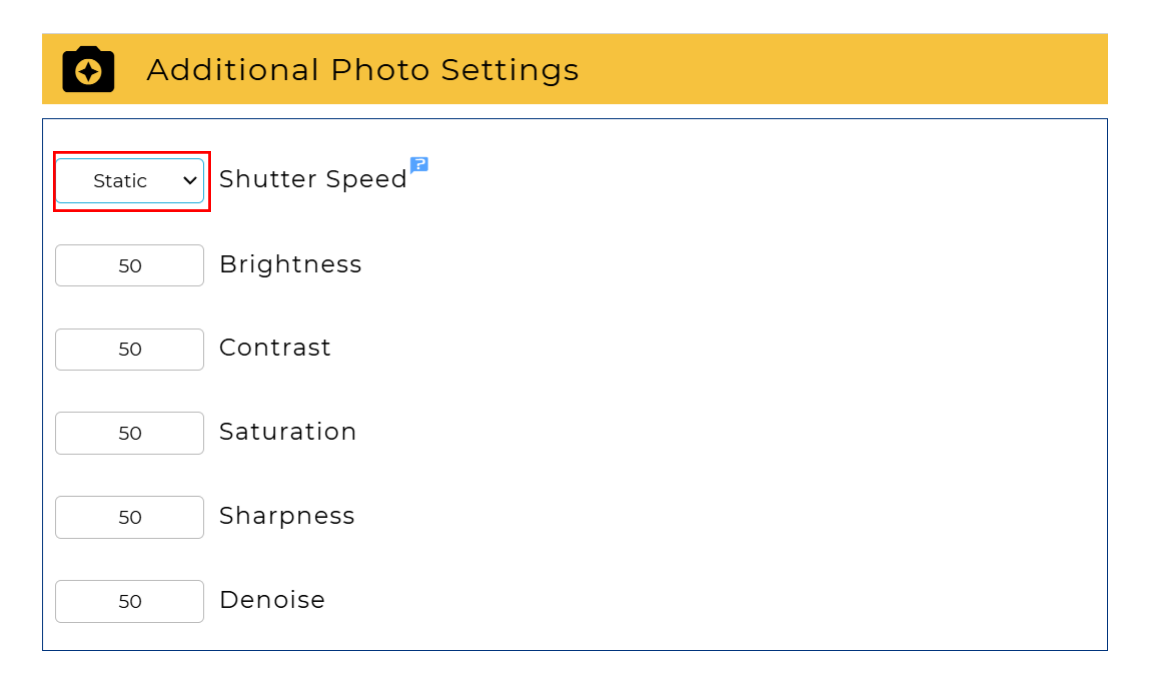
Timelapse Capture Schedule
Scroll further down to set the capture schedule. Select the following:
- Capture Type
- Interval Window or Timed Capture
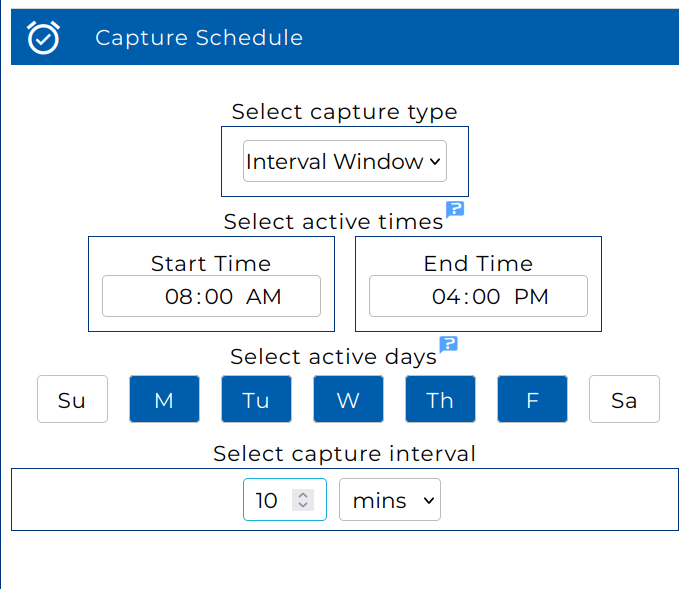
Interval Window
Interval Window will capture a photo every 'x' minutes within the nominated interval window.
For example, in the "Interval Window" schedule below, the camera will capture an image:
- Between 8am and 4pm
- On each weekday Monday through Friday inclusive
- Every 10 mins
Timed Capture
Timed capture lets you capture an image at up to 8 x specific times of the day.
For example, in the "Timed Capture" schedule below, the camera will capture an image:
- At 9am, 10:30am, 4pm and 5:30pm
- On Monday, Wednesday and Friday

Note: Only 1 x mode can be selected, you cannot run a timed capture and interval window schedule concurrently.
Just return to this page on CloudX if you ever want to check the camera view or adjust the capture schedule again.