How do I create a timelapse in CloudX?Updated 3 months ago
Overview
This article explains how to create a timelapse video in CloudX using your captured images. It also covers the main settings that affect the length, speed, and quality of the final video.
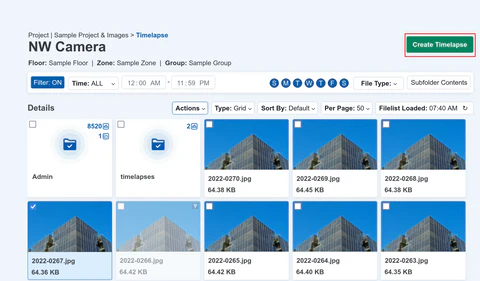
When viewing your images, simple click on the Create Timelapse" button at the top of the page.
You will then need to make a few choices on the next screen as follows:
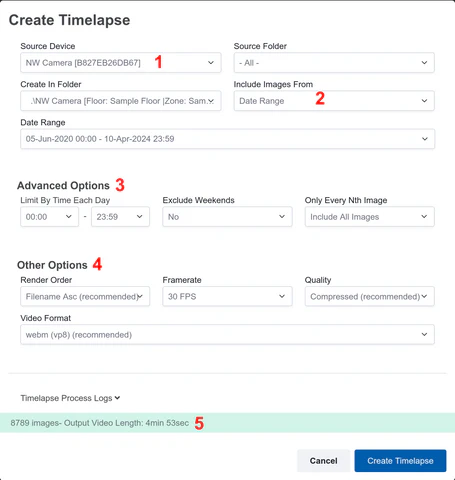
Referring to the screenshot and associated numbering above.
Steps
- Select the correct device from the dropdown menu if you have more than one CamDo controller on your account.
You can also change the folder, but this is usually not necessary. - Choose the timeframe for the images you want to include.
To set a custom period, select Date Range. Open Advanced options if you want to further refine the timelapse.
You can use these settings to:- limit images to certain times of day
- exclude weekends
- include every Nth image to reduce the number of frames
- Example: if your camera captured an image every 5 minutes and you want the timelapse to use 10 minute intervals, select Include every 2nd image.
- Review the video settings before creating the timelapse.
- Render order defaults to oldest to newest and usually does not need to be changed.
- Frame rate defaults to 30 fps. Lower frame rates will slow the video down, while higher frame rates will shorten the video.
- Quality defaults to Compressed. Select Original if you want higher quality, but note that the file size may be much larger.
- Check the image count shown at the bottom of the page.
If it shows 0 images, adjust your timeframe or filter settings. - Review the estimated length of the timelapse based on the number of selected images.
Example: 8,601 images at 30 fps will create a video about 287 seconds long.
If you want a shorter video, increase the frame rate or use the Nth image option under Advanced options. - Click Create Timelapse.
What happens next
CloudX will begin rendering the timelapse video. This may take a few minutes.
When the video is ready, you will receive:
- an email notification
- a notification in CloudX in the top right corner of the menu bar
Where can I find generated timelapse videos?
All generated videos can be viewed from the main image viewing page in the timelapse folder.